
|
|
|
| Thu Jan 4, 2001 - 8:22 PM EST - By James Hromadka | |
|
|
|
|
 I
really like the HandyGPS application.
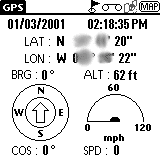
Select Mode | GPS to bring up a screen that
basically lets you know where you are and where you are going (I have the
location scrambled to protect the secret location of the Visor Cave).
Compass direction, speed, location, bearing -- it's all here. Use
Preference
| Setup to adjust your Max Speed and
units.
 I
like the GPS Mode for its simplicity.
Nexian could have stopped there and the Basic HandyGPS
application would have been fine. But there's more. Go into
Navigation Mode and you can utilize Waypoints
and Routes. The easiest way to create Waypoints is to tap the flag
icon at the top of the screen. It will use your current lat/lon or
you can specify your own coordinates. Give your Waypoint a name and
tap Ok.
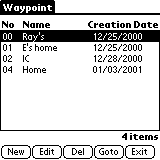
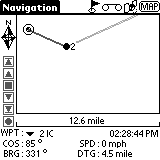
To view a waypoint, select Tool | Waypoint, select the appropriate one, then tap Goto. The Navigation screen appears with your current bearing, speed, and distance to goal (DTG).
 What
if you want to stop by work to get some cash at the credit union before
heading to the in-laws as your final destination? That's where Routes
come in. Select Tool | Route to enter
a series of waypoints that you want to travel. Select your Route
and tap Goto to view it.
Use the Visor's Up/Down hardware buttons to zoom in & out, and tap-and-drag to pan the screen.
 Oh,
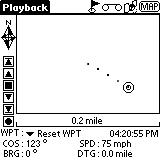
did I mention you can record and playback your wanderings? Tap the
"tape" icon (to the right of the flag), give your recording a name, and
tap Ok (you can rename it later if need be). You will see the tape
icon animate to let you know you're recording. Tap the icon again
to stop the recording. Use Tool | Playback
to relive your travels.
Best of all, recordings you make in the HandyGPS
app can be played back in UbiGo and vice versa.
Unfortunately, Waypoints don't transfer between the two applications.
In both applications, tap the GPS button (at the top) to switch between
one another.
UbiGo >>
Copyright ©1999-2016 Smartphone Experts. All rights reserved :
Terms of Use : Privacy Policy
VisorCentral is not not affiliated with or endorsed by Handspring Inc in any way.